FieldEZ Version 4.7.3 Released
We are excited to announce couple of feature enhancements to the FieldEZ Application:
- SLA Management Module (new)
- Call Create / Edit Page (revamped)
- Timesheets Tab (revamped)
- Call Details Tab (the new page is now default)
1. SLA Management Module (BETA)
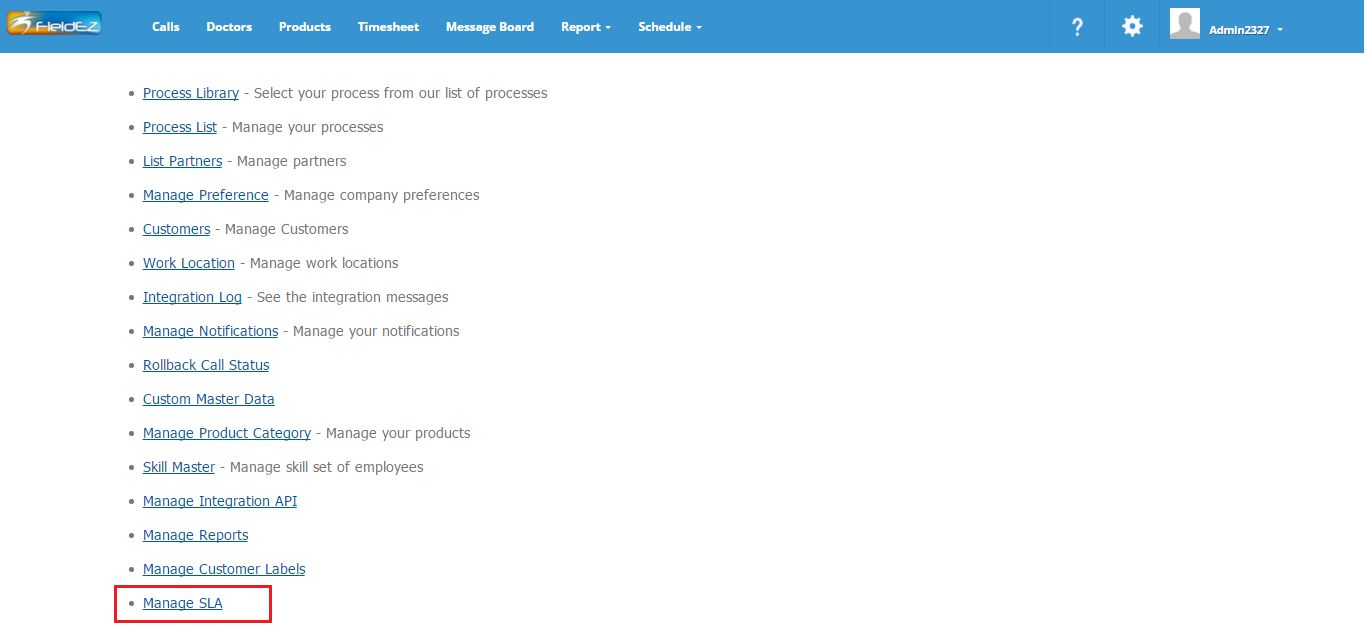
TO ACCESS THE NEW SLA MANAGEMENT PAGE:
Click on settings icons on the top right corner of the header, and select the Advanced Settings tab. Under the advanced settings page, click on the ‘Manage SLA’ link to access the new SLA Management (BETA) module.
The SLA Management module helps organization set and configure Service Level Agreement (SLA) notification alerts for a wide variety of actions, including:
- Assigned User not responded to a new ticket after a predefined SLA time
- Assigned User not reached a particular stage of the process (say, reached site) within a predefined SLA time
- Assigned User not able to close a ticket within a predefine SLA time
In this BETA release, the admin can create new SLA for each workflow or business process defined, and set an email / notification alert. This notification can be sent any or all of the below:
- Assigned User
- Manager
- Admin
- End-Customer
- External contact via email
Subsequent releases will also have the provision to update the end-customer via SMS (mobile text message)
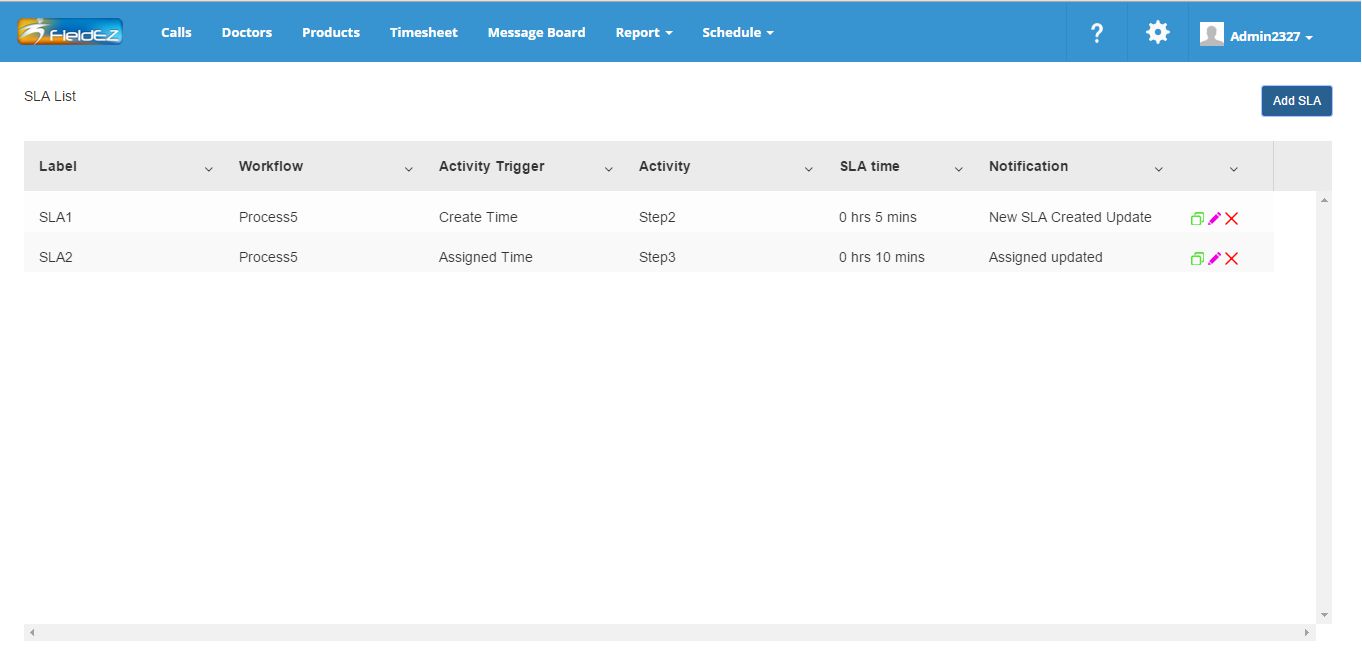
1.1 SLA List Page
The image below shows the landing page when one clicks on the Manage SLA link from Advanced Settings section. The page lists the SLAs configured, with options to copy (duplicate), edit and delete the SLA.
Create New SLA
Click on the ‘Add SLA’ button on the top left corner. You will be prompted with a screen as shown below:
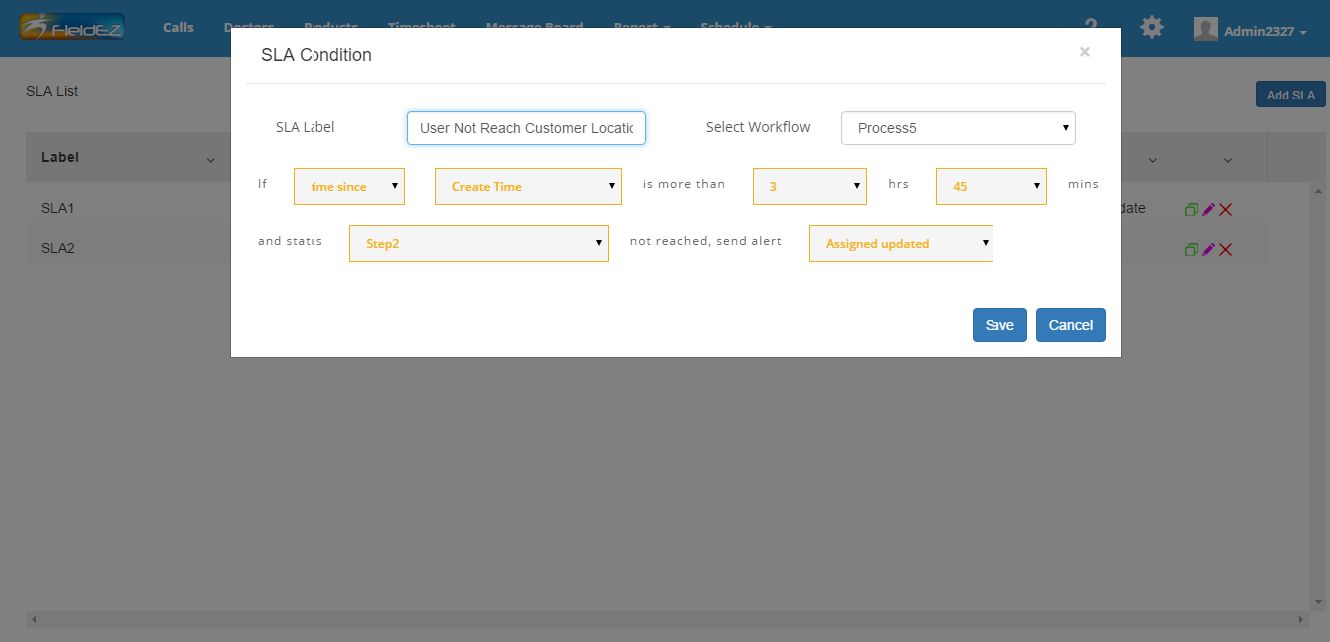
SLA Label: Give a name to the SLA you are creating
Select Workflow: The SLA can be created for a specific workflow
Create Time / Assigned Time: The SLA can be triggered based on lapsed time from either the Ticket Create Time or the Assigned End Time
Hours and Minutes: The SLA will trigger once the time duration specified in these fields have lapsed beyond the Create time / Assigned time
Status: This a status checker field. If the specified status is not reached at the time the SLA is triggered, only then will it trigger the alert
Alert action: This box will list the notification templates, and can be configured by going to the Notification page.
If there are no notification templates predefined, you can create:
Settings icon –> Advanced Settings –> Manage Notifications –> Create Notifications –> Create New Notification

Note: Please select the action type as alert in the drop-down list
2. Create / Edit Call
The Create and Edit Call pages have been revamped with a more intuitive and up-to-date UI format. All the existing functions are retained and no new features additions have been added at present.
3. Timesheet
The new timesheet tab provides a high-level view of the users’ attendance across various time periods, with ability to drill-down to specific user level information.
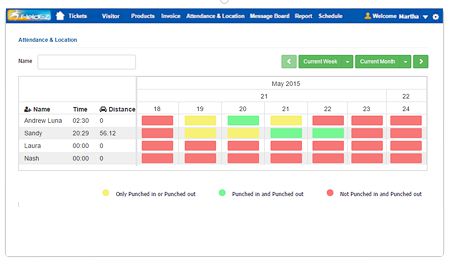
The initial screen shows the clock-in (punch-in) status of the user – green shows clocked in and clocked out, yellow shows either one of clock-in or clock-out, while red shows the users who have neither clocked-in nor clocked-out.
On click of the individual colour cells, one can get an idea of the route and distance covered by the particular user as viewed on the map.
4. Call Details Page
The new Call Details page released as per the previous release (4.7.2) has now been made the default page. To understand more details about the Call Details page and its function, please refer to the previous release notes (4.7.2) – Click here.


Leave a Reply
Want to join the discussion?Feel free to contribute!