FieldEZ Version 4.7.2 Released
We are thrilled to bring you two important feature additions to the FieldEZ Mobile Application:
- Call Details Page (revamped)
- Map-based Scheduler (new)
1. New Call Details Page (BETA)
TO ACCESS THE NEW CALL DETAILS PAGE:
Go to the existing call details page (from the call list page). A link will be available at the top of the call details page – on click it will take you to the new Call Details (BETA) page.
The Call Details (named as Visit Details / Ticket Details / Job Details, etc. based on the account configuration) is now available in an easy-to-read and intuitive layout with sections highlighting the status of the job, among other details.
1.1 Call Summary Section
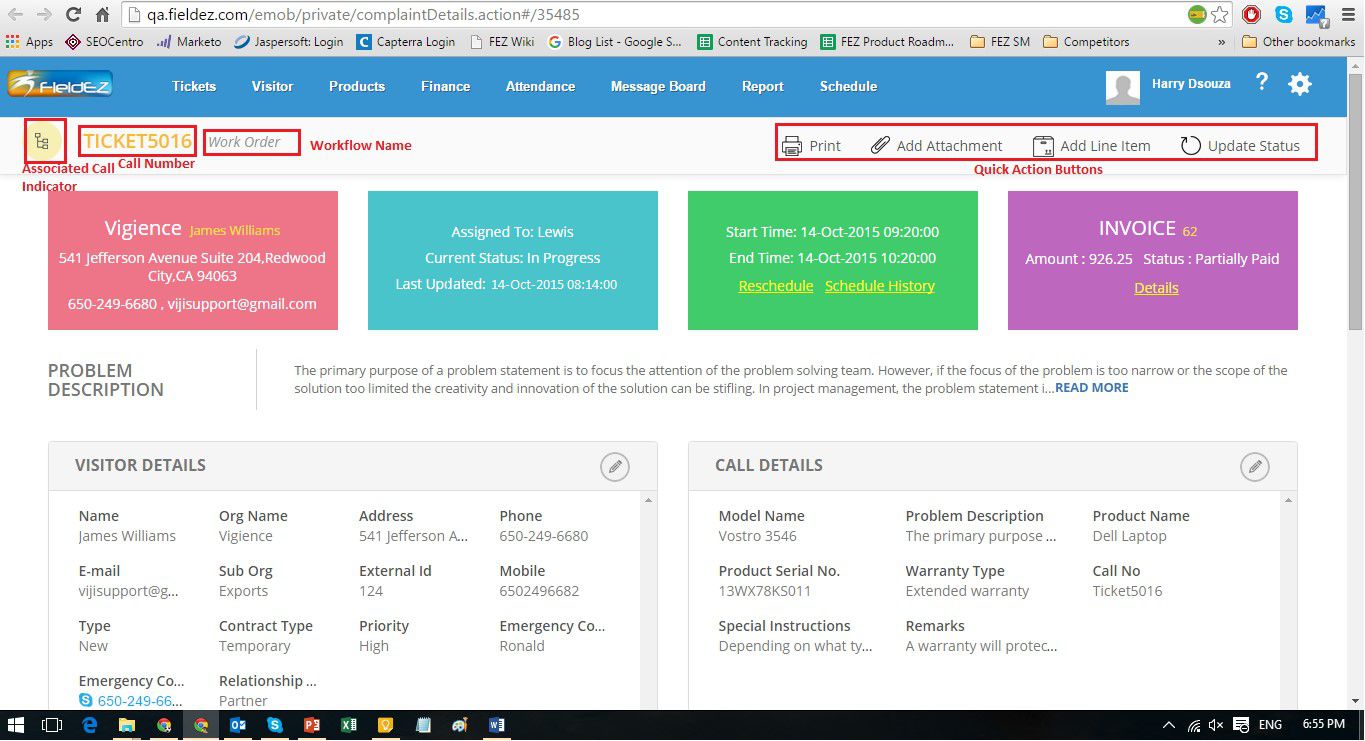
The top section of the Call Details page provides a summary of the Call / Ticket. These are depicted as four boxes:
- Red Box : Customer Details (Company Name, Customer Name, Address, Contact No.)
- Blue Box : Assignment Details (Assigned To, Current Status, Last Update Time)
- Green Box : Schedule Details (Start and End Time, Schedule History, Option to Reschedule)
- Purple Box : Invoice / Quote Details (Invoice / Quote Number, Amount and Status) *
* Quotes / Invoice will be shown only if the information is updated for the particular call. Also note that only the latest quote / invoice will be shown.
Below the box, you will see the Problem Description section, elaborating the call.
1.2 Customer and Call Level Information
The two boxes below the Problem Description lists the complete customer and call level details. One can click on the Edit icon to edit the respective details.
1.3 Status Update
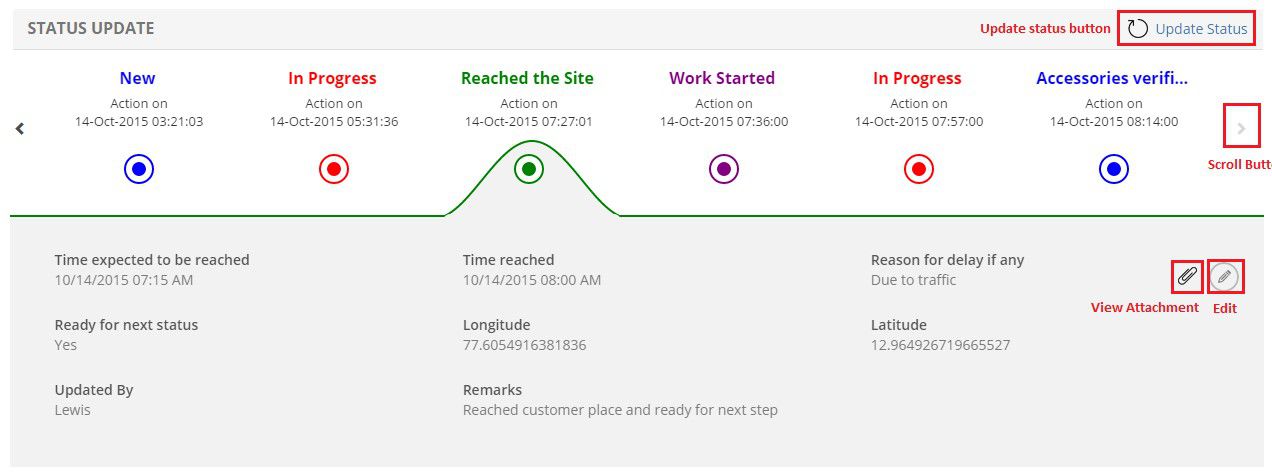
The Status Update section has an intuitive horizontal time-chart that lists each of the steps along with all status-level fields. Users can navigate between the steps by clicking on round button. Use the left and right grey arrows at the corners to scroll across the timeline.
There are two buttons in the Status Update section:
- Click on the Update Status button to update from the current status.
- Click on the Attachment icon within the status level field section (if available, on the right corner), to go to view the attachments.
- Click on the Edit icon within the status level field section to edit the fields for the particular status.
1.4 Associated Calls
The Associated Calls section will show all child calls / tickets linked to the current Call. The user can view details of the child call by clicking the respective call box.
1.5 Line Items
The line item section lists all parts or products associated with the call, along with related attributes and fields
1.6 Attachment
All Call-level as well as Status-level attachments can be viewed in this section. If available, a thumbnail preview of the file will also be shown.
2. Map-Based Scheduler (BETA)
TO ACCESS THE NEW MAP SCHEDULER:
Click on the Schedule Tab on the top header bar, and select the DAY MAP VIEW – Beta option.
You can also access the Map Scheduler directly from the existing Day scheduler using the toggle button.
The map scheduler provides users the ability to view, schedule and assign calls / jobs using a powerful yet easy-to-use map GUI.
2.1 View the users on the maps
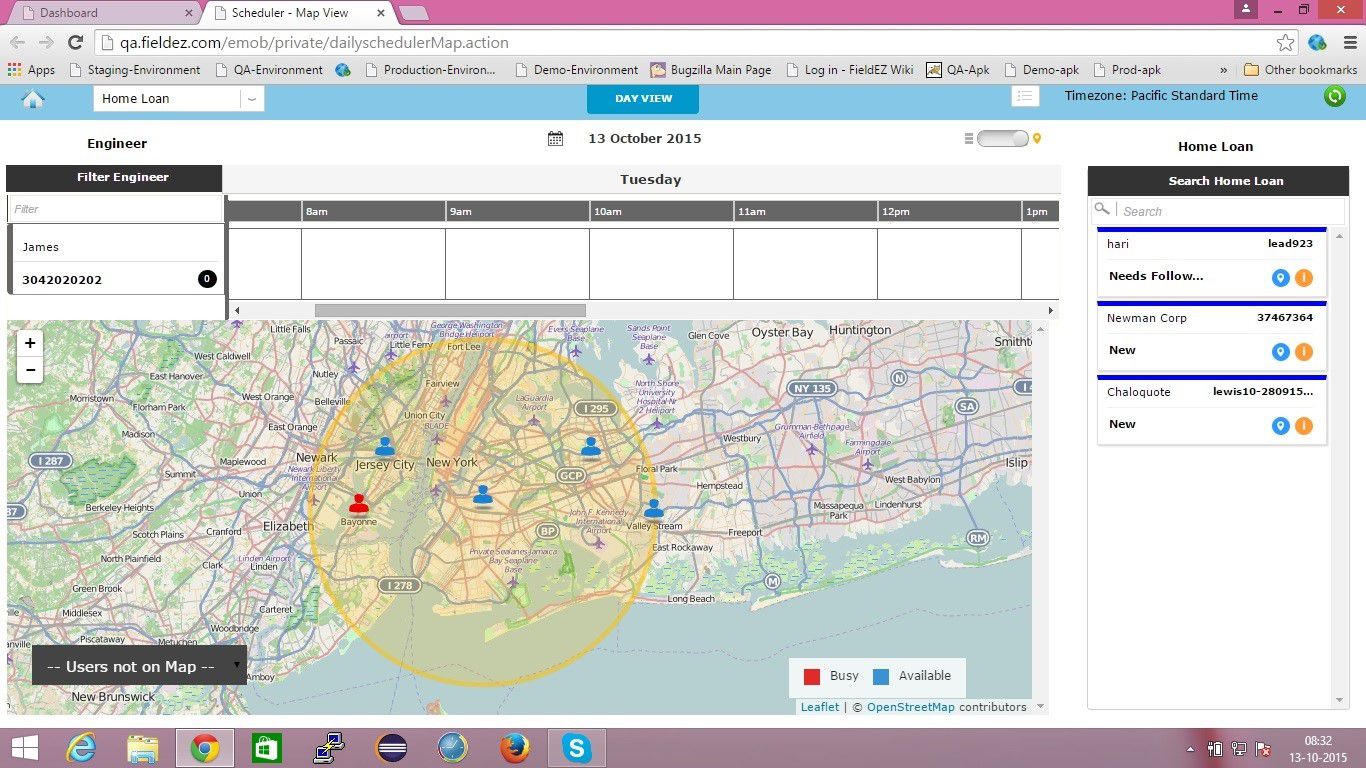
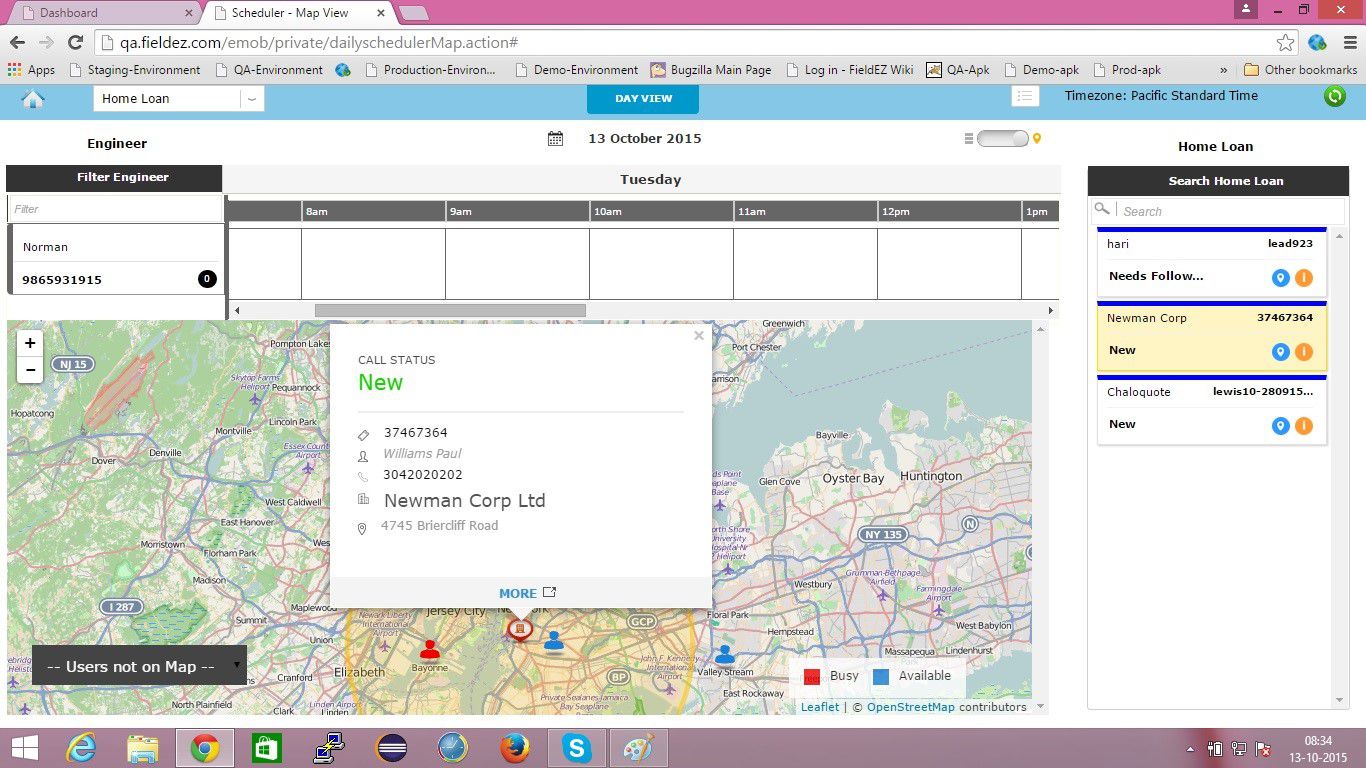
The initial view of the map will show the users’ location based on the last known location (captured from the mobile).
Please note that there might be circumstances where the user’s location is not available (say, the person is offline, or the location has not been captured from the mobile). This list of users is available in the bottom right corner of the screen.
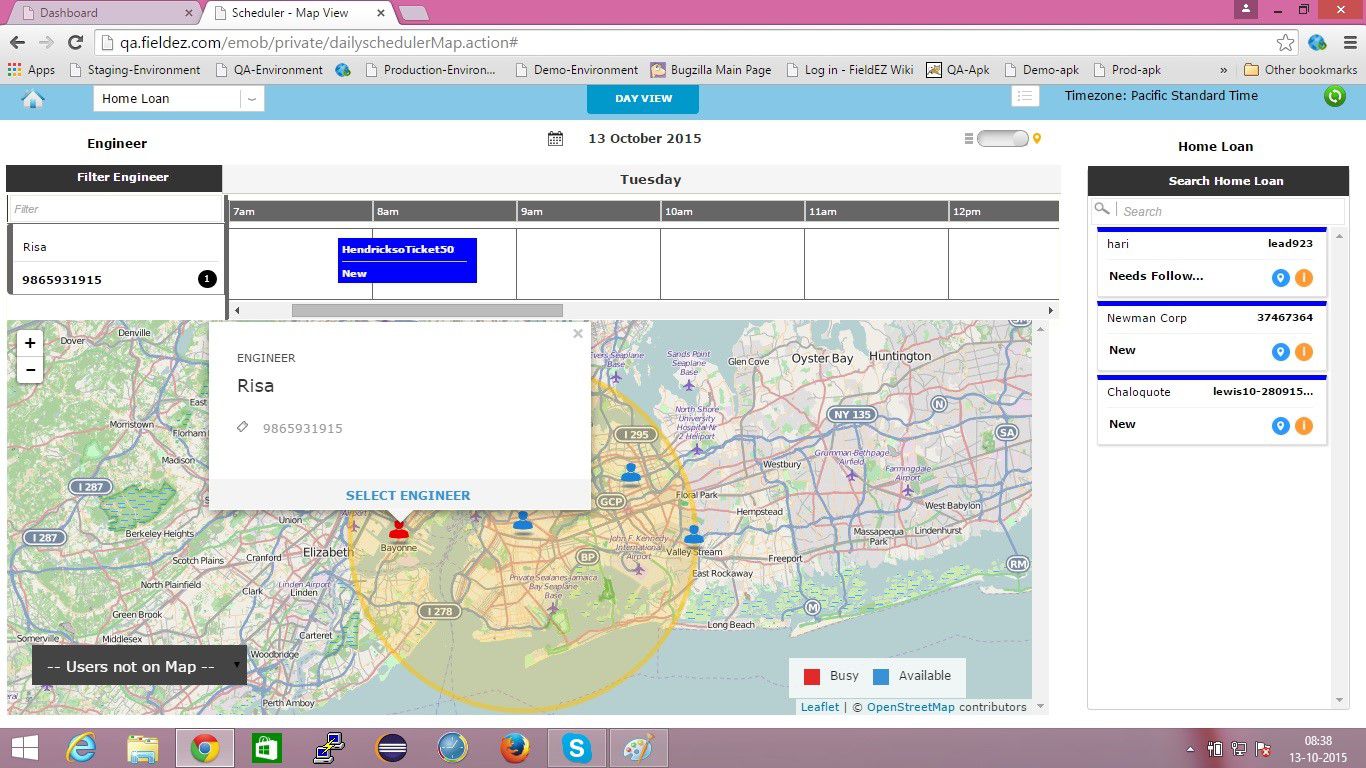
The icon color of the user shows whether the person is currently busy on a call (red icon) or free (blue icon).
A yellow translucent circle floats over the map and centres to the user / job that is currently selected. This is set at a default of 20km (12mi), but can be configured. Please get in touch with FieldEZ support to customize the distance.
The other sections are similar to that of the existing daily scheduler, with the list of unscheduled ticket on the right side vertical column, a reduced version of the user’s status (just above the map – only the selected user’s schedule will be visible), and options like toggle between the map and daily scheduler in the header section.
2.2 How to schedule using the map scheduler
a) Select and view the unassigned ticket details:
The right hand side lists the unassigned tickets / jobs, for the particular work location and workflow. There are two button available against each ticket: the ‘i’ icon provide the advanced call details while the ‘map pointer’ icon shows the ticket on the map.
b) Click the ticket to view on the map:
As in the case of the existing daily scheduler, one can click on the unassigned tickets on the right hand side to view the advanced details of the ticket / job. On click, the map centres to the ticket location and highlights the nearby users.
c) View details of the users around the ticket
By clicking on the users, the dispatch manager can view the basic details of the employee including name and contact number. The selected field user’s schedule for the day is also shown just above the map.
Note: If you would like to view and assign and ticket to a field user who is not shown on the map, simple click on the “User not on Map” drop-list (bottom-right corner) and select the field user.
d) Drag and drop the ticket to be assigned to the respective selected user:
Simple drag and drop the ticket from right section into the selected field user’ schedule – dropping it at the time when you want to schedule. You will prompted to enter the exact start and end time; once this is saved the ticket has been assigned, and will disappear from the right box (unassigned ticket list)








Leave a Reply
Want to join the discussion?Feel free to contribute!