FieldEZ Version 4.7.0 Released
1. Crew Scheduling
This new feature allows dispatchers and users to divide a single ticket / job into multiple smaller tickets or sub-tickets. These sub-tickets can be assigned and scheduled to individual field users, thus making it possible to create and track a single ticket assigned to a crew or team.
By creating a master ticket and linking sub-tickets, users can view, modify and assign specific jobs of a single project to different people in the team. This makes crew and project management simpler and more efficient.
IMPORTANT: To enable crew scheduling, please contact support at +91-80-4536-7777 (India)/ +1 844-343-FIELDEZ (US/ rest of the world) or support@fieldez.com
How to create a Master ticket?
Create the ticket as you would normally do so from the main Ticket / Call tab.
How to create associated tickets or sub-tickets?
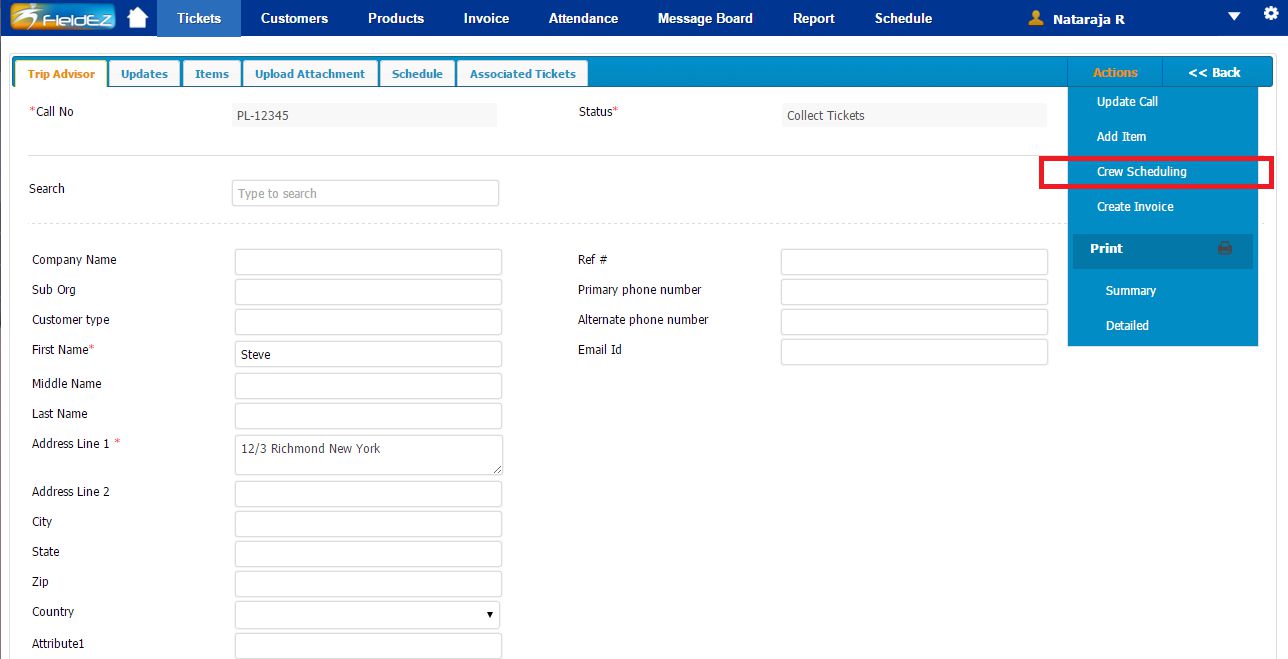
Click on the parent ticket to view the details. Under the details page, select the ‘Actions; Menu (right-hand side) and click on ‘Crew Scheduling’
Where can I see the sub-tasks?
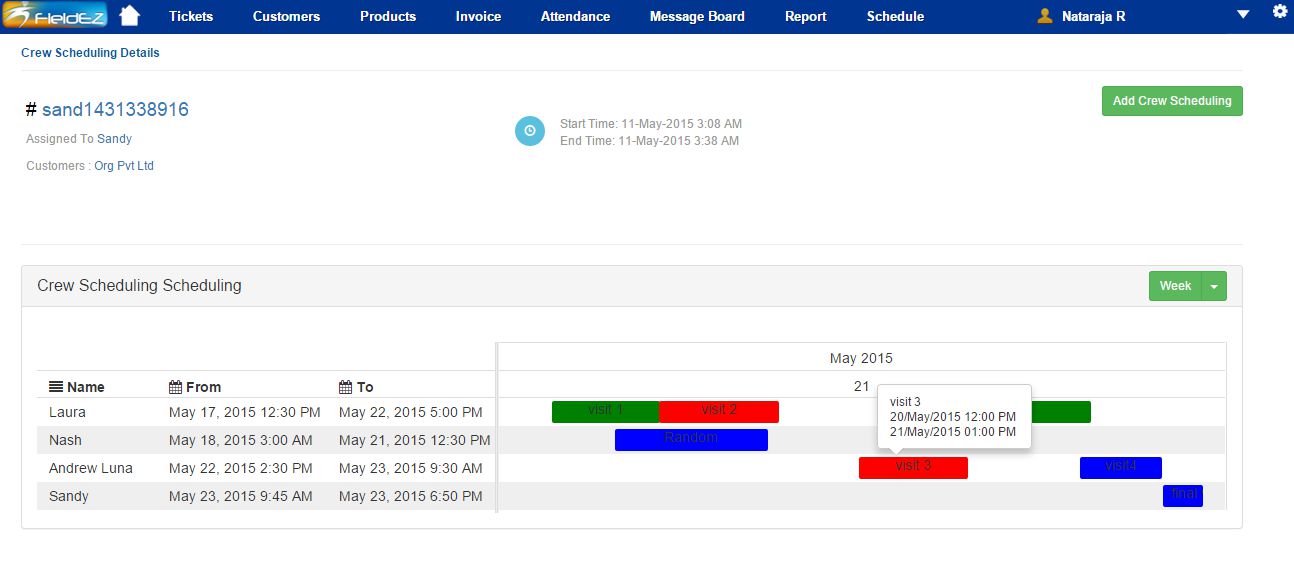
The sub-tasks can be viewed in the ‘Associated Tickets’ tab of the master ticket detail page.
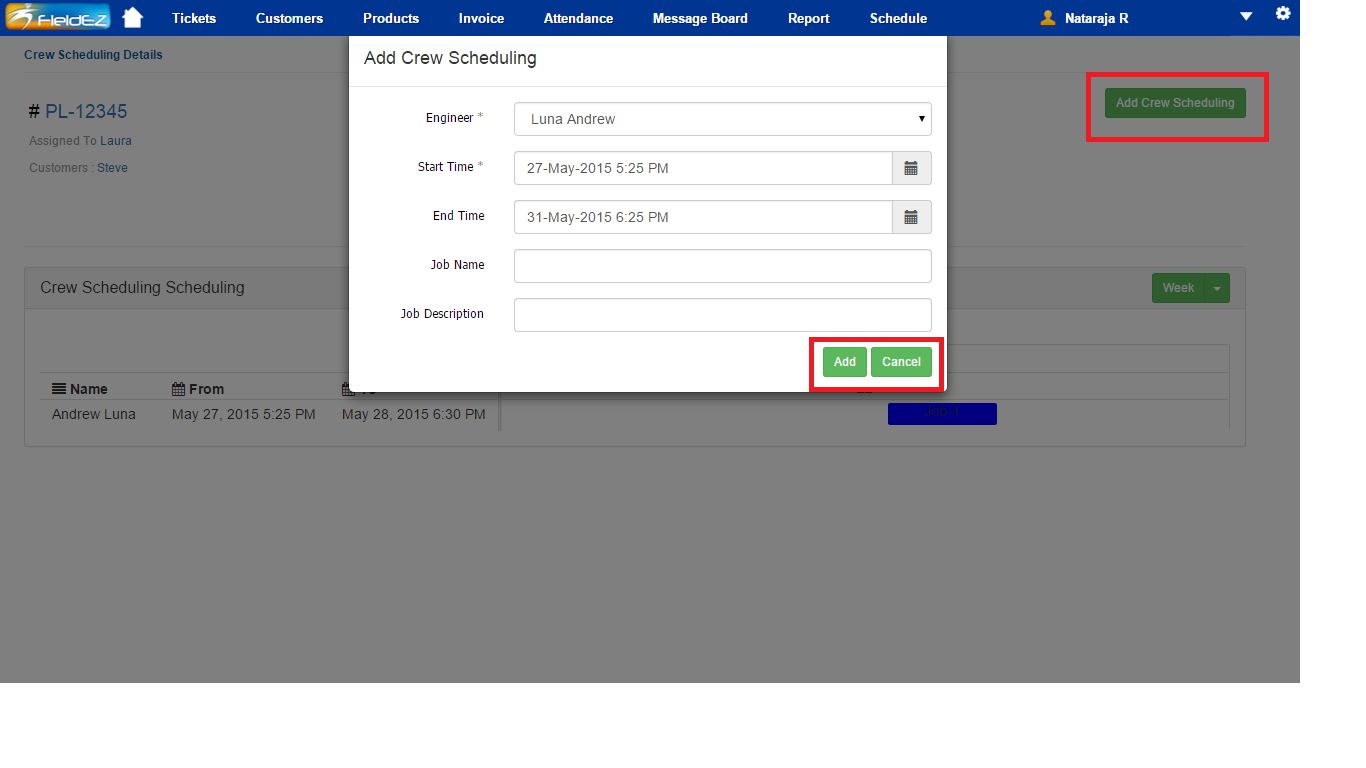
To view on the scheduler, click on the Actions menu (right-hand side) in the ticket details page and select ‘Crew Scheduling’. The scheduler can be viewed in Day, Week or Month format. The scheduler also color-codes the tickets as per the current status of each job.
To check more details of sub-tasks in the scheduler, double-click on the job in the chart. A pop-up screen will show the basic details of the job, while the advanced details can be viewed by selecting the job code number (top left corner of the pop-up screen).

The sub-tasks are also shown in the weekly and daily scheduler along with the color.
How do I add crew members and modify the scheduled jobs?
The crew scheduling chart can be used to modify the date / time of the scheduled jobs. Click on the add crew scheduling button on the top right corner to add a new crew member to the job. Please note that the job is automatically created during the addition of the crew member itself. The jobs can also be re-assigned directly from this chart by a simple drag-and-drop.
2. Actions Menu
A menu option called ‘Actions’ is provided in the right hand side of the ticket details page. This Menu is a quick and easily accessible list of major action steps for a ticket. These include:
- Update the Ticket or Job
- Add Line Item for the Job
- Add Crew Members, Create and Schedule Sub-tickets
- Create Invoice for the Job
- Print Job Details
Other Updates and Feature Additions
3. Start Date, End Date in Create Call
Previously, users were asked to provide the Start Date and the Duration of the call. This made it difficult to provide an exact end date and time for a particular job.
With the new release, we have made the option to provide start date and end date instead of duration. As default the end date-time will be one hour ahead of the start time.
4. Multi day schedule
Users can now schedule tickets that run for multiple days. The date-time fields are enhanced to make it easy to schedule and track.
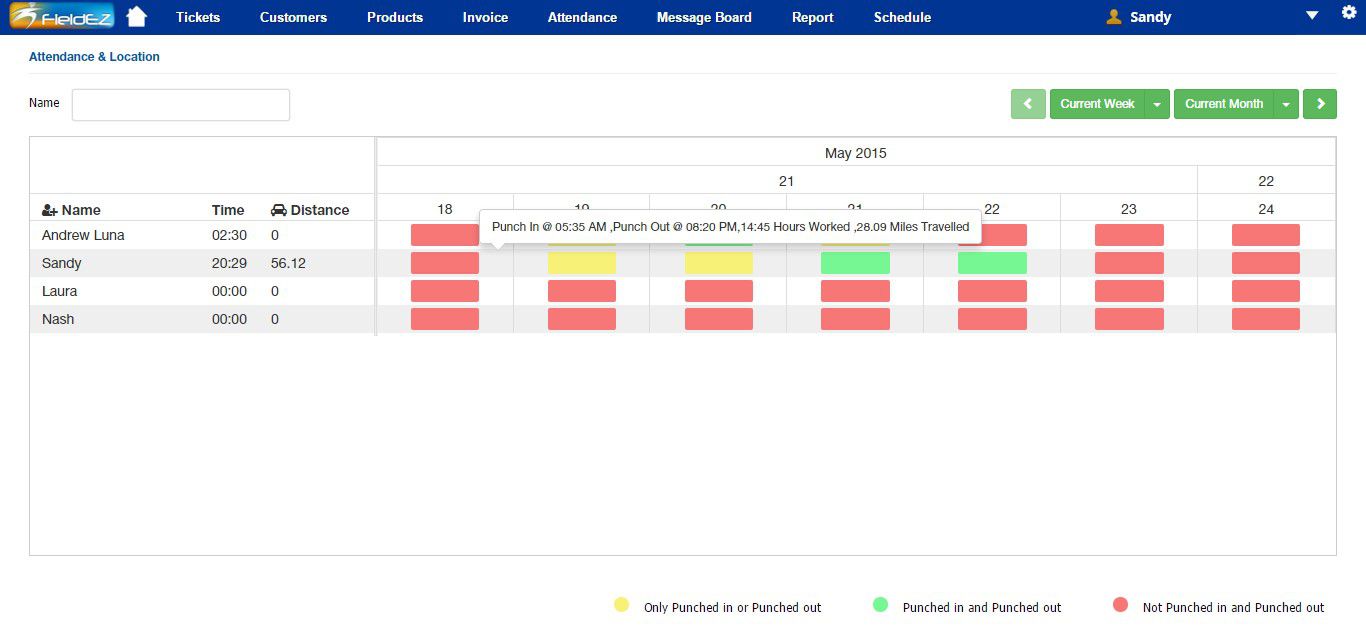
5. Attendance Overview
A new graphical attendance chart is available under the ‘Attendance’ menu. This provides a simple view of the total time clocked-in by the field users, as well as the distance travelled. This can filtered for current week or current month for easy view.
Colors are used to depict the status of each user’s clock-in / clock-out details:
- Yellow : Only Clocked-in or Clocked-out (forgot to clock attendance once in a day)
- Green : Clocked-in and Clocked-out (correctly clocked the attendance)
- Red : Not Clocked-in and Clocked-out (absent / forgot to clock)


Leave a Reply
Want to join the discussion?Feel free to contribute!